Understand all types of markers you can place on the map
9/11/2023

Creating a map is simple, you only choose the name and the style. And immediately after that, it’s time to start adding your first content on the map. A content that we call Markers. Today we’re gonna take a look at all the different types of markers that you can place on your map and describe when they are particularly useful.
Pins
Pin markers allow you to highlight specific destinations, locations, or points of interest. Mapheim gives you the ability to drop a pin in any spot on the map instantly by inputting either location names or coordinates for precise pin placement.
Pins are always visible and always have the same size, no matter the zoom of the map. When zooming out, the pins automatically create clusters together that show the number of pins in the given area.

The pin is often used when your map is spanning a bigger geographical area. Use pins for example when creating travel maps to showcase all the areas of interest to visit.
You can choose from a variety of pre-created icons and images, or you can upload your own. The visuals are completely customizable so you can adjust the sizes, colors, and background, allowing you to create a visual language that resonates with your readers. Guide your visitors with these pin markers and don’t forget to make them interactive as pins usually serve as the type of marker to provide more information about the place.
Images
Images are geographically accurate markers. You can set the size and rotation of each image to cover exactly the area you want it to cover, and once you zoom out, the image gets smaller until it’s too small to be visible. That is the main difference as opposed to pins that are visible all the time.
You can use the same pre-generated gallery that is available for icons. You can choose from pictures of nature, animals, vehicles, buildings, and much more. Or again, upload your content.
Image markers have a wide variety of uses, some of the most common are:
- Make your map more fun, engaging, and branded
- Communicate practical information, and navigate users with image-based arrows, images of stairs, etc.
- Put any content you pre-created in Figma, Canva, or any other tool
- Images can serve the same function as icons but usually for maps that span a smaller area: e.g. a festival map.
Directions
Direction markers are used to automatically create directional lines between two points on the map, with options for walking, driving, or cycling routes. Use direction markers when you want to illustrate routes - such as road trips, hiking trails, or directions to the entrance of the building.
It’s often useful to combine direction markers with Pins to highlight the start, finish, and important places on the way. And if the path is not what you think it should be, you can click on any part of the direction line. That will create another stop that you can drag & drop to a different place where it serves as a transition point on the way.

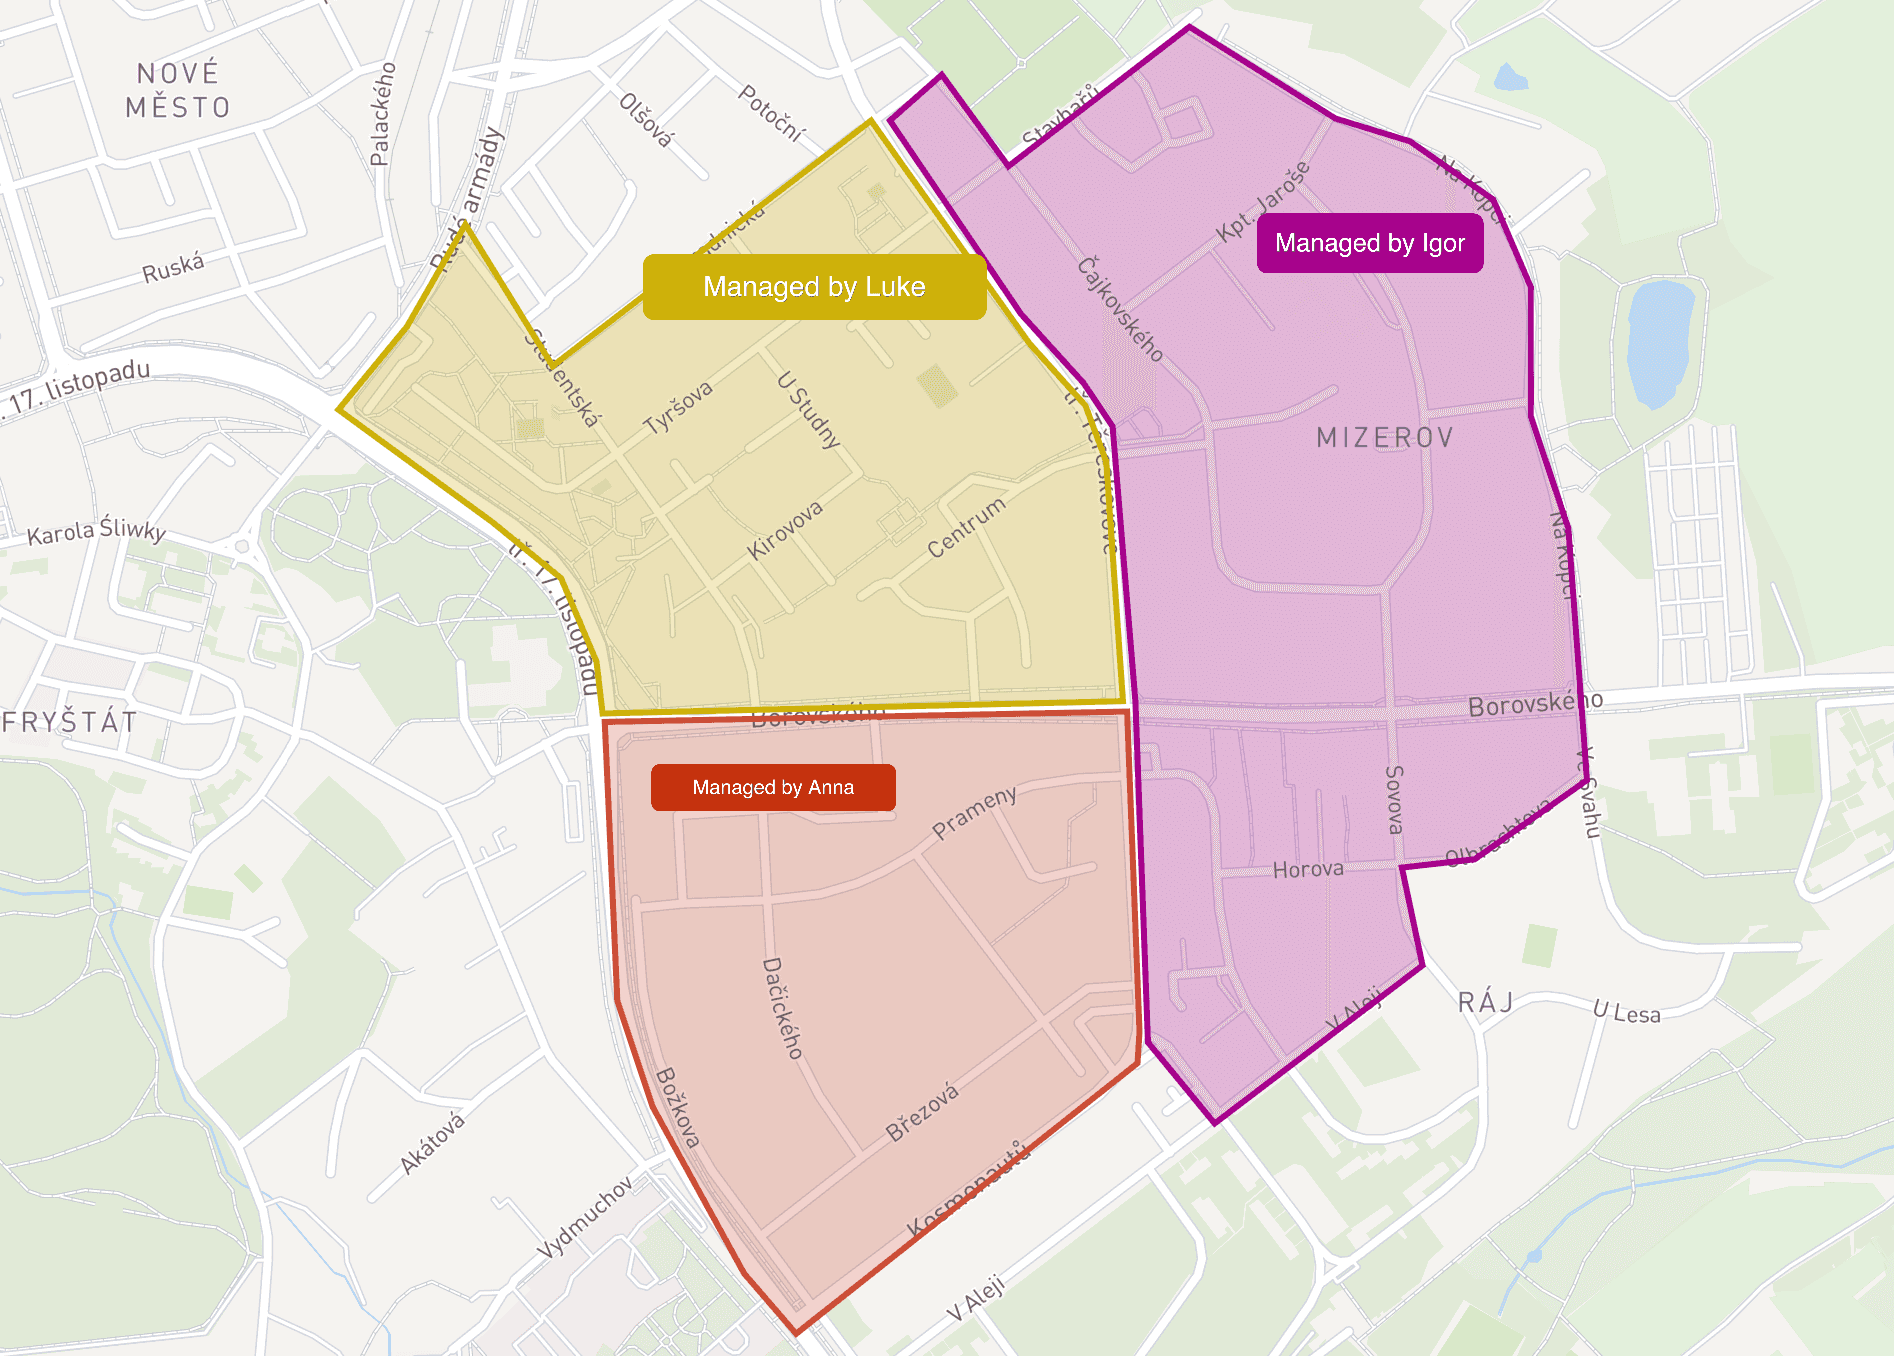
Polygons
Polygons are very useful to highlight specific areas on the map. Use it for example to:
- Show the area of a parking place,
- Communicate the construction area or a restricted area
- Highlight your property or select the area of a whole city or even a country
A special kind of polygon is a transparent polygon - if you set the color to be transparent, you will end up with a polygon that is not visible in the map view. These are useful to make clickable areas without anything being visible. That can be useful in two ways:
- If you started on an image map, you may already indicate clickable places. In that case, use the transparent polygon to make the desired area clickable
- When you have multiple markers close to each other and you want to make them all interactive with the same detail, you can create the interactivity on the transparent polygon instead of doing it for each of the markers individually
Line
Lines are perfect for indicating directions or custom paths in places where the direction markers don’t work - like inside, in areas without routes or trails, or if you need perfect control over the directions. Use lines also to point to a specific point in the map where visitors should zoom in, or use them as arrows.
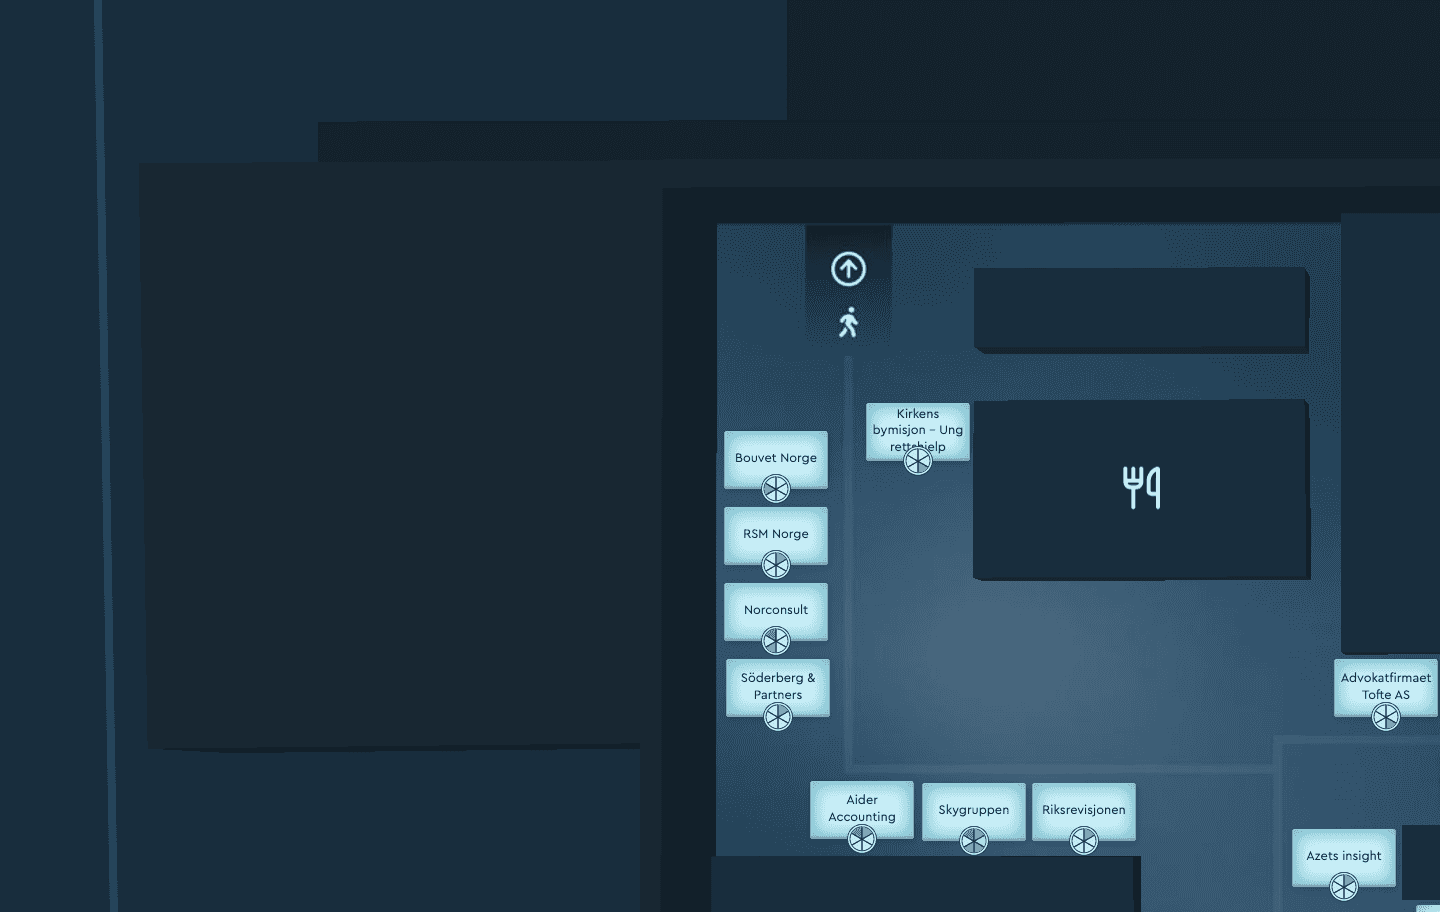
3D Wall
With Mapheim, you can create both inside and outside maps or a combination of both. In any case, you can use walls to:
- Highlight buildings that are important for your maps
- Create surrounding walls of a building where events are happening
- Create a structure of the building - includes inner walls, visualize important obstacles that people can use for better navigation
The 3D walls are a must-have if you’re creating an indoor map. See the example of an indoor map below. All the surrounding and inner walls are created with this type of marker